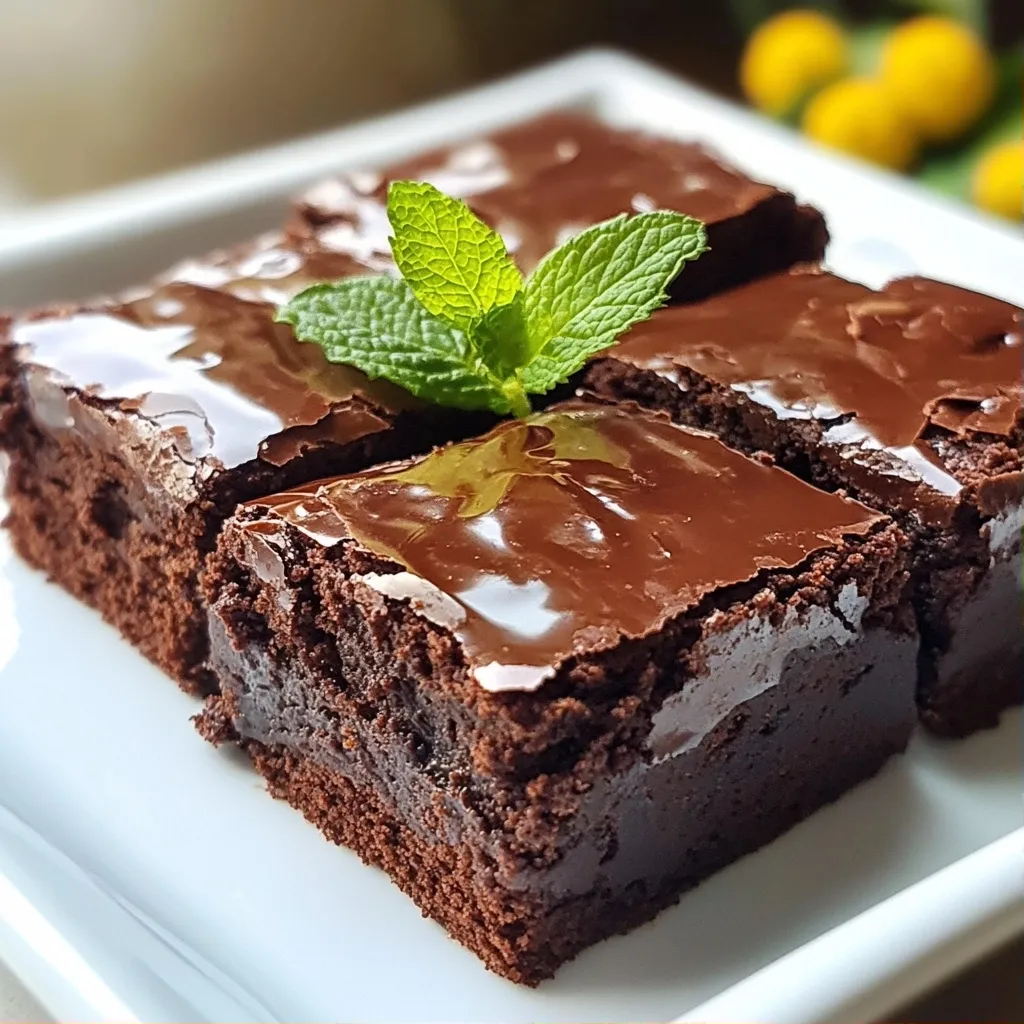
Are you ready to indulge in something both delicious and healthy? Meet your new favorite treat: Gooey Protein Chocolate Mint Brownies! This easy recipe packs in protein and minty goodness without sacrificing flavor. You’ll love how simple it is to whip up a batch that satisfies your sweet tooth. Let's dive into this mouthwatering recipe and create brownies that are not just good but good for you!
Why I Love This Recipe
- Healthier Indulgence: These brownies are packed with protein and made with wholesome ingredients, making them a guilt-free treat.
- Minty Freshness: The addition of mint extract brings a refreshing flavor that perfectly complements the rich chocolate.
- Easy to Make: With simple steps and quick prep time, you can whip these up in no time, perfect for a last-minute dessert.
- Customizable: Add dark chocolate chips or nuts for extra texture, or keep them simple for a classic brownie experience.
Ingredients
List of Ingredients
- 1 cup almond flour
- 1/2 cup cocoa powder
- 1/2 cup protein powder (chocolate flavor)
- 1/2 cup maple syrup
- 1/2 cup coconut oil, melted
- 1/4 cup unsweetened applesauce
- 2 large eggs
- 1 teaspoon mint extract
- 1/2 teaspoon baking soda
- 1/4 teaspoon salt
- 1/2 cup dark chocolate chips (optional)
- Fresh mint leaves for garnish (optional)
These ingredients create a rich and gooey brownie. Almond flour gives a nice base and adds protein. Cocoa powder adds the deep, chocolate flavor you crave. The chocolate protein powder boosts the protein content without changing the taste. Maple syrup sweetens the brownies and keeps them moist. Melted coconut oil blends well and adds healthy fat. Unsweetened applesauce keeps the brownies soft and adds moisture.
Eggs bind everything together, making the brownies fudgy. Mint extract adds a fresh twist that pairs well with chocolate. Baking soda helps the brownies rise, giving them a light texture. A pinch of salt balances the sweetness. Dark chocolate chips are optional, but they can add extra chocolatey goodness.
To garnish, fresh mint leaves not only look pretty but also enhance the mint flavor. Feel free to play with these ingredients to suit your taste. Each one serves a purpose, making your brownies both tasty and nutritious.
Step-by-Step Instructions
Preparation Steps
1. Preheat your oven to 350°F (175°C). Grease a 9x9-inch baking pan or line it with parchment paper. This helps with easy removal later.
2. In a large bowl, mix the dry ingredients. Combine 1 cup of almond flour, 1/2 cup of cocoa powder, 1/2 cup of protein powder, 1/2 teaspoon of baking soda, and 1/4 teaspoon of salt. Make sure everything is well combined for even flavor.
3. In another bowl, combine the wet ingredients. Mix 1/2 cup of melted coconut oil, 1/2 cup of maple syrup, 1/4 cup of unsweetened applesauce, and 2 large eggs until the mixture is smooth.
4. Stir in 1 teaspoon of mint extract into the wet mixture. This adds a refreshing mint flavor to your brownies.
5. Now, fold the wet ingredients into the dry mix. Stir gently until just combined. Be careful not to overmix; you want a soft batter.
6. If you like, fold in 1/2 cup of dark chocolate chips. This will make your brownies even more decadent.
7. Pour the brownie batter into the prepared pan. Spread it evenly to ensure it bakes well.
Baking Instructions
8. Bake in the preheated oven for about 20-25 minutes. Check for doneness by inserting a toothpick into the center. It should come out with a few moist crumbs, but not wet batter.
9. After baking, let the brownies cool in the pan for about 10 minutes. Then, transfer them to a wire rack to cool completely. This helps them set and makes cutting easier.
Tips & Tricks
Expert Tips for Perfect Brownies
- Avoid overmixing: Stir the wet and dry ingredients until just combined. Overmixing leads to tough brownies.
- Using the right baking pan: A 9x9-inch pan works best for these brownies. This size helps ensure even baking.
- Recommended baking times: Bake for 20-25 minutes. Check doneness with a toothpick; a few moist crumbs are perfect.
Serving Suggestions
- Garnish ideas with fresh mint: Add fresh mint leaves on top of your brownies. This adds color and a burst of minty flavor.
- Serving warm vs. at room temperature: Warm brownies are gooey and rich. Room temperature brownies are easier to cut and still delicious. Enjoy them both ways!
Pro Tips
- Use Room Temperature Ingredients: Allow your eggs and applesauce to come to room temperature for better mixing and a smoother batter.
- Check for Doneness: To ensure your brownies are perfectly baked, insert a toothpick into the center; it should come out with a few moist crumbs, not wet batter.
- Experiment with Add-ins: Feel free to add nuts, seeds, or dried fruits for additional flavor and texture variations in your brownies.
- Store Properly: Keep cooled brownies in an airtight container at room temperature for up to a week, or freeze for longer storage.
Variations
Flavor Variations
You can make these brownies even more fun. Try adding nuts or seeds to the mix. Chopped walnuts, almonds, or sunflower seeds add a nice crunch. They also give you healthy fats and protein.
Swapping out different protein flavors is another option. If you prefer vanilla or peanut butter protein powder, go for it! Each flavor will give a unique twist. Just remember to keep the ratios the same for best results.
Dietary Substitutions
If you need vegan options, use flax eggs instead of regular eggs. To make one flax egg, mix one tablespoon of ground flaxseed with three tablespoons of water. Let it sit for five minutes until it thickens. This swap works well and keeps the brownies moist.
For gluten-free alternatives, use a gluten-free all-purpose flour blend. This will keep the texture similar to almond flour. You can also try oat flour for a different taste. Just make sure all your ingredients are gluten-free.
Storage Info
How to Store Brownies
To keep your brownies fresh, let them cool completely. Once cooled, cut them into squares. Place the brownies in an airtight container. This keeps them moist and tasty. Use parchment paper between layers to avoid sticking. Store the container in a cool, dry place. If you want them to last longer, you can put them in the fridge. Just remember, cold brownies may be a bit firmer.
Freezing Instructions
Freezing is a great way to save brownies for later. First, cool the brownies completely. Then, wrap each square in plastic wrap. After wrapping, place the squares in a freezer-safe bag or container. This protects them from freezer burn. You can freeze them for up to three months.
When you are ready to enjoy, take them out and let them thaw. Place them in the fridge overnight for best results. If you want them warm, you can heat them in the microwave for about 10-15 seconds. This will bring back their gooey texture. Enjoy your brownies as if they were fresh!
FAQs
Can I substitute almond flour?
Yes, you can. You can use oat flour or coconut flour. Both work well. Just remember, coconut flour absorbs more liquid. You may need less of it.
How can I make these brownies even more fudgy?
To make them fudgier, add more coconut oil or applesauce. You can also reduce the baking time slightly. Less baking makes them more moist.
How long do the brownies last?
These brownies last about five days at room temperature. Keep them in an airtight container. You can also store them in the fridge for longer freshness.
Can I add more protein without changing the texture?
Yes, you can add a bit more protein powder. Start with one to two tablespoons. Mix it well with the dry ingredients for even texture.
What can I use instead of maple syrup?
You can use honey or agave syrup. Both add sweetness and flavor. If you want a sugar-free option, consider using a sugar substitute.
These brownies are easy to make and taste great. We covered all the ingredients, which include almond flour, cocoa powder, and dark chocolate chips. You learned step-by-step how to mix, bake, and store them. I shared tips to make perfect brownies and some fun variations, like adding nuts.
Remember, you can adjust ingredients to suit your diet. Enjoy these brownies warm or chilled. They’re tasty no matter how you serve them. Now it's time to make a batch and treat yourself!